If you are reading these rules for the first time, ignore the text along the right hand side. These rules serve as a summary to help you quickly familiarize yourself with the game.
→ Rules (PDF)
Show
→ summary only
→ detailed version only
→ both summary and detailed version

The peaks of Snowdonia rise before you encased in mist, their
summits barely visible. The highest is Snowdon (Wyddfa)
herself, at 1,085 metres. The year is 1894, and the Snowdon
Mountain Tramroad and Hotels Company Limited has been
formed to build a branch line from Llanberis to the summit. You
can scarcely believe it is possible!
In Snowdonia, players represent companies providing labour
for the construction of the Snowdon Mountain Railway. Unlike
in other train games, you will have to excavate your way up
the mountain-side, as well as make and lay track and construct
viaducts and stations; all this, in competition with the weather
of the Welsh mountains and your fellow players. You will be
assisted by a train and can collect essential materials from the
Stock Yard. You will obtain special work contracts that give you
bonus points at the end of the game.
Each turn, a player allocates labourers to specific tasks, such
as getting supplies, excavating the mountain, making or
laying track, building parts of stations, or obtaining lucrative
contracts. A player uses supplies to construct sections of the
railway that will yield victory points once the route has been
completed. Players can also buy trains to ship in extra labourers
and to improve their work rate. A player who completes
contracts for specific work will gain bonuses at the end of the
game.
Can you contribute more than the other players to the
magnificence of the Snowdon Mountain Railway?
Game Components
66
cards, comprising
5
Alternative action cards for variations in the number of players
30
7
8
14
"Track" cards (double-sided)
2
Reference cards
40
“Iron Ore” (orange cubes)
90
“Rubble” (small brown cubes)
8
Game markers (black discs)
5
Event markers (white cubes)
18
“Steel Bars” (black rods)
11
Weather discs (3 each in yellow and blue and 5 in grey)
80
Ownership cubes (16 each in yellow, blue, green, pink and purple)
20
Labourer pawns (4 each in yellow, blue, green, pink and purple)
1
Start Player marker (wooden train)
Game Setup
-
GAME BOARD
Place the game board in the center of the table,
so that all players can reach it.
-
START PLAYER
Randomly determine who will be
the first to play and give that
player the Start Player Marker.
-
PLAYER PIECES
Players take all the pieces of their colour.
The 16 x Ownership cubes per player is a fixed
limit. If these run out, the player cannot
take ownership of any more Track cards or
Building sites.
-
SURVEYORS
Each player puts one of their Labourer pawns as Surveyor in any
empty space on Llanberis.
-
LABOURERS
Each player puts two of their Labourers
into their personal supply for use in
the first turn, leaving the remaining Labourer in the Pub.
-
RAILWAY ROUTE: STATION CARDS
For the Snowdon game, use the yellow side of the Station
cards; the blue side is for the Blaneau Ffestiniog game.
Sort them into numerical order by the number on their top
right hand corners. Waterfall Station (2) is not used
if playing solo or with 2 players. The Passing Loop
(4½) is only used with 5 players.
Starting at Llanberis (printed on the board) and going
clockwise round the board, lay out Station cards in numerical
order with spaces between them, so they go from Two Viaducts (1)
to Yr Wyddfa (7).
-
RAILWAY ROUTE: TRACK CARDS
Shuffle the Track cards. The number of Track cards between each
Station card is printed on each Station card's top left hand corner.
Place randomly drawn Track cards, shovel side up, between the Station
cards adjusting them, so that the Track and Station cards are evenly
spaced.
-
RUBBLE
Place rubble on each Track card equal to the number on
the card, and also put the indicated number of rubble
pieces on the Station cards in the boxes marked with a shovel.
-
ACTION SPACE CARDS
The game board has the action spaces for a
3 player game printed at the top in seven
Action Areas marked A to G. If you are playing
solo, or with 2, 4 or 5 players, take the alternative
action space cards and place them over the Action
Areas printed on the board, so that the number at
the top of each Action Area matches the number of players.
-
GAME MARKERS
Put a Game marker on each of the 2 dots
on the Work Rate tracks. Put the other 6
Game markers with the general supply of
pieces off the board.
-
CONTRACT CARDS
If playing solo or with 2 players,
remove two Contract cards marked
with '3-5' (28 and 29) from the deck.
Shuffle the Contract cards and place them
in a pile face down on the board.
-
FIRST WEATHER FORECAST
Take the top 3 Contract cards and
put them face-down, one per space,
on the numbered spaces at the bottom
of the board; these spaces form the
Site Office.
Take a Weather disc of the same colour
as the weather icon on the back of the
middle Contract card and put it into middle
space of the Weather Track; then repeat for
the right-most card putting the Weather disc
into the lowest space of the Weather Track.
Turn the three Contract cards face-up.
-
TRAINS
In the 2 to 5 player game shuffle the Train
cards and place six Trains, selected randomly,
below the game board to form the Engine Shed.
Set aside the remaining Train card for now -
it will not be available as train in this game.
Put Coal from general supply onto each Train
as indicated on the card.
-
STOCK YARD AND SUPPLY BAG
Put 7 Iron Ore, 4 Stone and 1 Coal on to their spaces
in the Stock Yard. Put the number of Iron Ore, Stone
and Coal into the Supply Bag as indicated in the
Supply Table.
All other Iron Ore and Stone should be put back in the game box;
they will not be needed in this game.
-
GENERAL SUPPLY
Put all remaining pieces into a general
supply area.
Supply Table
|
1 player |
2 players |
3 players |
4 players |
5 players |
 |
16 |
20 |
20 |
27 |
33 |
 |
10 |
11 |
11 |
16 |
20 |
 |
6 (minus Coal for starting train) |
Put Coal on the Train cards in the game and all remaining Coal into the bag. |
 |
4 |
5 |
5 |
5 |
5 |
|
Remove
-
Waterfall Station (2)
-
Passing Loop (4 ½)
-
3-5 Contract Cards
(28 and 29)
|
Remove
-
Waterfall Station (2)
-
Passing Loop (4 ½)
-
3-5 Contract Cards
(28 and 29)
|
Remove
|
Remove
|
Use all station cards.
|
Game sequence
The game is played using the following sequence:
-
Intial Setup
-
Rounds
-
Assign Labourers
-
Resolve Actions
-
Restock Contract cards
-
Check the Weather
-
Restock the Stock Yard
-
Repeat Rounds until the End of Game is reached
-
End of Game Scoring
Rounds
Assign Labourers
Players take it in turns to place on Labourer at a time
into any non-empty action space.
In clockwise order beginning with the Start Player, each player places
one of their Labourers from their personal supply onto any of the numbered
action spaces in any of the Action Areas on the game board (A through G).
Continue to place Labourers, one piece per player at a time, util all players have
placed all of their Labourers in personal supply.
An extra Labourer for the round can be bought with coal if you have a train.
Before placing their first Labourer, each player with a Train may return
one Coal (two Coal for Train No. 6) from their personal stock to the Supply
Bag to take the temporary Labourer in their colour from the Pub and put
it into their personal supply. The temporary Labourer can be assigned to
actions just like any other Labourer.
Resolve Actions
Actions are resolved in a fixed order -
from A (the Stock Yard) through to
G (Surveyor).
Action Areas are resolved in order A through G. Within each
Action Area resolve the actions in numerical order one-by-one from space
[1]. If a player has a Labourer on an action space, that player
must carry out that action; taking actions is not optional. If a player
has two or more Labourers within a single Action Area, that player must
carry out the action once for each Labourer.
After completing actions, return Labourers to each player's personal
supply, except that temporary Labourers (a player's third Labourer)
are returned to the Pub when used.
Contract Cards
Contract cards give your actions
a boost - cards are played first
and then the Labourers do their work.
Contract cards have effects printed on the middle part of the card that
modify the action you are taking or change the rules in your favor. They
also have a scoring bonus on the top part that is used at the end of the game.
Before the first action is resolved for an Action Area, players may play
Contract cards. In clockwise order beginning with the Start Player, each player
may play one or more Contract cards that have the current Action Area shown
at the bottom left of the card. When a Contract card has been played, turn it
sideways to show that its effect has been used and leave the card in the
player's area. Card effects persist until the end of the current round.
A STOCK YARD
Take up to three cubes into
your personal supply (at most 1 coal).
Take 3 Iron Ore and/or Stone from those available in the
Stock Yard into personal supply. Alternatively, take one
Coal and two Iron Ore and/or Stone.
If a Labourer is in the last space of the Stock Yard, the owning
player additionally becomes Start Player; that player takes the
Start Player Marker; if no-one occupies this space, the Start
Player Marker remains with the current Start Player.
Resources hoarding will keep the bag
emptier and cause more Events to occur!
This may be part of your plan, or it may
be your undoing!
B EXCAVATION
Removing the Rubble
depends on the current
weather.
Rubble is removed in a
strict order 'up' the
mountain.
When all rubble has been
excavated, an extra
Build Action Area
becomes available.
The current Excavation Work Rate is shown by the Excavation Work Rate marker.
Take the number of Rubble cubes equal to the current Excavation Work Rate,
including any bonuses from owned Train and/or played Contract card, from
Track and/or Station cards into personal supply. A player with a Labourer
on an Excavation action space must take the full number of Rubble cubes up
to the current Excavation work rate plus any bonuses and cannot choose to
take fewer, unless there is no Rubble left to excavate.
Rubble must be taken in this priority order:
-
The Track card with remaining Rubble closest up the mountain to Llanberis.
-
If all Rubble has been removed from Track cards leading up to a Station
card, then take Rubble from the leftmost excavation site on the Station card.
The player who takes the last Rubble cube from an excavation site on a Station card
will gain the victory points for the site at the end of the game. Put one of that
player's Ownership markers on the excavation site.
If there isn't enough rubble left on the whole route for your action, take
as many cubes as there are available.
At the end of the round in which there are no more Rubble to excavate
from any Track and Station cards, take the Train card set aside at the
start and place it on the Excavate Action Area with the B Build Action
Area uppermost. This card now replaces the Excavate Action Area and provides
an extra Build action space in position B of the Action Area sequence.
C WORKS
3 times conversion:
3 Iron Ore can be converted
into 1 Steel Bar.
2 Rubble can be converted
into 1 Stone.
Convert 3 Iron Ore into 1 Steel Bar, or change 2 Rubble
into 1 Stone. Do this up to three times per action space.
You may mix these trades if you choose, for example gain
2 Steel Bars and 1 Stone, or 2 Stone and 1 Steel Bar,
and so on.
Take Steel Bars from general supply and Stone from the Supply
Bag; if the bag runs out, players cannot make more Stone until
some is returned to the bag. Put the Iron Ore back into the
Supply Bag and the Rubble into general supply.
The Works - conversion of
iron into steel is important
and restricted each round; don't
be afraid to go there first!
D LAY TRACK
Laying track depends on the
current weather. Each track
costs one Steel bar and
the player places one of
his Ownership markers.
When the last track has been
laid, the game ends.
The current Lay Track Work Rate is shown by the Lay Track Work Rate marker. Return
to the general supply a number of Steel Bars up to the current Lay Track Work Rate
plus any bonuses and, for each one, turn over the fully-excavated Track card closest
up the mountain to Llanberis. Place one of the player's Ownership markers on the Track
card to show which player laid the track.
A player with a Labourer on a Lay Track action space cannot choose to lay
track at less than the current Work Rate plus bonuses, unless the player has
insufficient Steel Bars, or there are not enough excavated Track cards, or there
is no more track to lay. If there are not enough excavated Track cards to complete
the action, the player must complete as many as possible.
Reminder:
When All track is laid, the game will finish (at the end of the round).
See End of Game section.
E BUILD
Trade in Steel Bars
or Stone to build parts
of the Stations for
victory points.
Alternatively trade in
Steel Bars to build a Train.
After all Track cards leading up to a Station card have been excavated,
each Labourer on a Build action space can build any one non-excavation site
of that Station (for excavation sites, see B Excavation).
Pay the resources specified on the non-excavation site of your choice by
putting them in the bag, if they are Stone or Iron Ore, or to the general
supply if they are Steel Bars, and place one of the owning player's markers
in the site space. Players must pay the full cost of the site, as non-excavation
sites cannot be partially fulfilled.
Note: Players cannot complete parts of Station until all Track cards up
to that Station card have been excavated. However, the excavation spaces on the
Station card do not need to be cleared; they represent the track continuing past
the Station up the mountain.
Alternatively a player can use this action to obtain a Train card from
the remaining available Trains, after the "Trains may be bought" event has happened
(see Resolving Events). The owning player takes on the remaining Train cards and
any Coal on it and pays the number of Steel Bars stated on the Train card to general
supply.
A player may not own more than one Train. A player can return a Train card to the
Engine Shed during a Build action when buying a different Train. Put more Coal
from the Supply Bag (if available) on the returned Train card, as indicated on the card.
F SITE OFFICE
Take a contract card of your choice.
Take a card of the player's choice to hand from the three face-up Contract cards
in the Site Office. Put the card face-up in the player's playing area (until it is
played and turned sideways, it counts as 'in your hand'), so that other players can
read it.
G MOVE THE SURVEYOR
Send your Surveyor further up
the mountain for more points
at the end of the game.
Move the player's Surveyor on to the next Station card
numerically along the route. Whether Rubble has been excavated
or track laid is irrelevant to the Surveyor.
The Surveyor is not just a default 'pass' action!
End of Round
Restock Contract Cards
If a Contract card is in Position [1] in the Site Office, put it
face down onto the discard pile.
Move any other Contract cards in the Site Office to the left to close
up any gaps. Add cards face up to the end of line from the top of the
Contract Card Deck, until the Site Office spaces have one each.
Check the Weather
Move the Weather discs one space along to the left. The disc furthest
to the left (with the "!" on it) shows the current weather.
Weather - watch what's coming up! You
can calculate work rates and decide
whether you want to excavate/lay track
first!
Look at the top (unrevealed) card of the Contract Card Deck, take a Weather disc
in a color matching the weather icon on the back of that card and place it
in the lowest position on the Weather Track.
Adjust the markers on the Excavation and Lay Track Work Rate Track according to
the current weather, referring to the Weather Key below the Weather Track. Don't
go off either end of the tracks!
 Sun = Excavate +2 spaces , Lay Track +1 space
 Rain = Excavate -1 space , Lay Track -1 space
 Fog = No Excavation B or Lay Track D actions
can be performed this round. Leave the Work Rate markers as they are, but put a Fog disc on
both those Action Areas to show that Labourers cannot be placed there.
Note: The Work Rate markers show how much Rubble can be excavated or track
laid by each Labourer assigned to one of those actions.
Restock the Stock Yard
The number of cubes required for restocking varies according to the
number of players and is shown on the board to the left of the Event
Track. Take the appropriate number of cubes at random from the Supply Bag
and place them on the Stock Yard spaces according to the cube type, Iron
Ore, Stone or Coal.
If any Event cubes have been drawn, put them on the Event Track, one cube
per space, starting immediately after the last occupied space; as you place
each Event cube, resolve the Event immediately before placing any more
Event cubes (see Resolving Events).
Be aware of the Event track and how empty
the resource bag is! Might there be a chance
that a couple of Event cubes coming out and
messing up your plans?
End of Game
The end of the game is triggered when the last track has been
laid (every Track card on the whole route has been completed).
If the last track is laid as the result of an Event, finish the
current round, then play one more round and proceed to
Scoring thereafter.
If a player laid the last track, finish the current round and
proceed to Scoring.
Additionally, in a 2-player game, as long as the last track has
not yet been laid, the game ends immediately if neither player
has any Ownership Markers left.
Scoring
Beginning with the Start Player each player scores victory points as follows.
Use a page of the Score Pad to record the scores.
When counting scoring objects (resources, Ownership
Markers, Surveyor position, etc.), you cannot score
more than one Contract card with the given objects;
for example, if you
have laid 4 tracks and have a '4 track' and a '3 track' Contract card, you can
only score one or the other, not both.
Completed sites on Station cards
Add the victory points for each excavation and non-excavation Building site
on which the player has an Ownership marker. Don't remove the Ownership markers
yet; these are used for scoring Contract card bonuses.
Completed Track
Add the victory points on each Track card on which the player has an Ownership
marker. Don't remove the Ownership markers yet; these are used for scoring
Contract card bonuses.
Contract Cards
Contract cards: You can't win the game without them - simple!
Players score bonus points for all Contract cards they have in their
playing area, regardless of whether or not their effect has been used.
The end game scoring section is the top part of the card.
Excavate bonus: put the indicated number of rubble pieces from personal
supply on to the card and gain the stated victory points. If the player cannot
pay that many rubble pieces, leave them where they are, and the card scores nothing.
Sample contract: 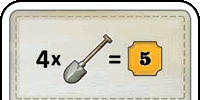
Track bonus: move the indicated number of that player's Owership markers
from completed Track cards onto the Contract card and gain the stated victory
points. If the player cannot move enough markers, leave them where they are and
the card scores nothing.
Sample contract: 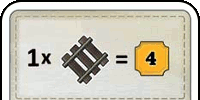
Building bonus: move the indicated number of the player's Ownership markers
from completed excavation and/or non-excavation building sites and gain the
victory points on the card. If the player cannot move enough markers, leave them
where they are and the card scores nothing.
Sample contract: 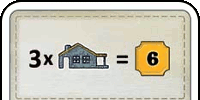
Track, Excavate and Building bonus: put the indicated number of rubble
pieces from the personal supply on to the card, retrieve the indicated number
of Ownership markers from completed excavation and/or non-excavation building
sites and Track to score the stated victory points. If the player cannot complete
all the conditions, leave rubble and markers where they are and the card scores
nothing.
Sample contract: 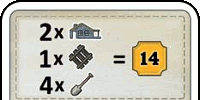
Coal bonus Contract Card (27): If the player has this Contract card, score
2 victory points per Coal cube in your personal stock.
Sample contract: 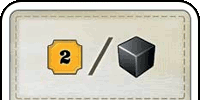
Surveyor bonus: If the player's Surveyor has reached at least as far
as the indicated station, the player scores the stated victory points. Otherwise
the player does not score the bonus on the card. The player's Surveyor still
scores the victory points on the Station card reached by the Surveyor.
Sample contract: 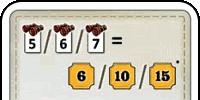
Train No. 4, Snowdon
If the player has No. 4 Snowdon, add 9 victory points to that player's
total.
The Surveyor
Add the victory points printed at the top right of the Station card
reached by the player's Surveyor.
Winning
The player with the most victory points is the winner.
In case of a tie, the tied player who was last in turn order
during the final round wins.
Resolving Events
When event cubes are drawn from the Supply bag, put them on the Events Track,
one cube per space, starting immediately after the last occupied space; as you
place each Event cube, resolve the Event immediately before placing any more
Event cubes. The Events are described below. Resolve each Event before moving on
to the next one. If the Events in 4, 7 or 10 occur, put 3 Event cubes back in
the bag as described below.
Events happen regardless of the Weather.
Excavate a number of rubble spaces immediately
Remove all Rubble cubes from a number of Track cards/Building spaces, starting
with the card closest to the start of the route, where the number is equal to the
current Excavation Work Rate. If you reach a Station card, take Rubble cubes from
the left-hand space and then, if necessary and present, the right-hand space
before carrying on up the mountain.
No player gains Rubble or scores for excavations done this way.
Lay Track immediately
Turn over a number of Track cards equal to the current Lay Track Work Rate,
starting with the Track card closest to the start of the route. Remove Rubble
from the Track cards if necessary (put them in general supply).
Ignore station cards when resolving this event.
No player scores for track laying done in this way.
Complete a Station immediately
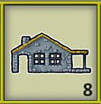
Put one of the Game markers on to the first Station in the route
that has not yet had all of its Building sites completed. Remove
any Rubble on the Station card and return it to general supply.
Players cannot carry out Excavate or Build actions in relation to
this Station card for the rest of the game.
Do not remove Ownership markers on the Station card; these can
still be used for end game bonus scoring.
Trains may now be bought
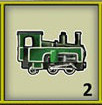
Train cannot be bought by any player until this event has occurred;
once it has happend, the Build action can be used to obtain a Train card.
Train maintenance is needed
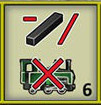
Each player with a Train card must immediately pay one Steel Bar to
general supply or discard a Train Maintenance Contract card (16 and 21).
If a player cannot, or chooses not, to pay, return the Train card to
the Engine Shed. Put more Coal from the Supply Bag (if available)
on to any returned Train cards, as indicated on the cards. If there
is less Coal than needed, re-stock the train in numerical oder starting
with the lowest.
Coal cubes held by the player are unaffected.

In addition to resolving the event on the numbered Event space,
put the indicated Event cubes back into the Supply bag. Continue to
place drawn Event cubes into spaces after the right-most occupied space
on the Event Track. This means that when the 10 space is reached, the 7
space will always be the right-most occupied, and the events will loop
through 8, 9 and 10 until the end of the game.
Solitaire Play
Snowdonia can also be played solitare, for which you play a series of games using a different Train
each time to see if you can beat your previous scores.
Solitaire is played in the same way as the normal game, except the following changes:
In the Solo game you will be playing a series of 7 games each with a different starting
Train card, starting with No. 1 and ending with No. 7. Select the train card for your
current solo game.
Setting up the Stock Yard
Draw 6 cubes out of the bag at random and place them on the Stock Yard (return any Event cubes
un-resolved at this point and redraw, so that 6 cubes are in the Stock Yard).
Check the Weather
Discard all Contract cards and deal out three new cards.
Trains
Only one Train card per game is available in the solo game. If you cannot maintain
your train when the "Train maintenance is needed" event happens, you cannot buy another.
Game end
If the last Track card in the route has not been placed, the game ends immediately
after the last (16th) Ownership marker is placed.
On the back of the Snowdon Stations are the Blaenau Ffestiniog Stations.
The Blaenau Ffestiniog game is for 1 to 4 players only.
Setup
Put the Blaenau Ffestiniog station on top of the Llanberis space on the
board, then lay out the rest of the route around the board as normal.
Remove Contract cards 28 and 29 from the game. Everything else
(resources in the Supply Bag, action spaces, weather, and so on) is the
same as the Snowdon game, except as follows.
Beginning with the Start Player and continuing clockwise round the
table, each player selects their starting position -
Blaenau Ffestiniog
or Porthmadog Harbour
- and puts their Surveyor in one of the three
spaces at the bottom of the card. There is a fixed limit of three spaces for
players’ Surveyor pawns on Blaenau Ffestiniog and Porthmadog Harbour,
so with 4 players it is possible that one player will not get a choice.
The last player to place their Surveyor chooses one end of the route to
place one of the game’s Game markers (no surveyor space is required).
This marker represents the game’s Surveyor who will alternate between
Blaenau Ffestiniog or Porthmadog Harbour as Events resolve.
Put an Event cube on space 7 of the Events Track. Only spaces 8, 9 and
10 of the Events Track are used. Players can use the Build Action to build
trains from the start of the game.
During Play
Excavate and Lay Track Actions
For the Excavate and Lay Track actions each player carries out the action along the route in the direction away from
that player’s starting position.
As soon as all rubble counters have been removed from Station 4, the ‘Train maintenance is needed’ event happens.
Build Action
When a player builds:
- Track cards do not have to be excavated before a Station card can be built upon.
-
A player can only build on Station cards from the player’s starting position up to and including the location
of that player’s Surveyor. Therefore, if players do not move their Surveyors, they will be unable to build sites
elsewhere.
-
Some Station cards give a player free resources each time that player builds on a non-excavation site.
Take these from the Supply Bag, if available, otherwise receive nothing.
Surveyor Action
When a player moves their Surveyor off Blaenau Ffestiniog or Porthmadog Harbour, put one of that player’s
Ownership markers in the starting Station to show that player’s starting position. This means that all players,
if they move, will have one less Ownership marker to use in the game.
What happens when an Event occurs?
If an Event occurs, resolve it from the end of the route where the game’s Surveyor is currently located - either
Blaenau Ffestiniog or Porthmadog Harbour (it never moves along the route). After the Event has been resolved,
move the game’s Surveyor to the starting Station at the opposite end; Events alternate between the two ends of the
railway route.
The Daffodil Line was a railway in Herefordshire and
Gloucestershire, England, running between Ledbury Town
and the City of Gloucester.
It opened in 1885 and most of the line was built over the route of the
southern section of the Herefordshire and Gloucestershire Canal and
Newent, my current home, was part of it.
This advanced scenario, for 1-4 players, mixes up the conventions of
the game a little more by adding daffodil collection, stone breaking and
canal filling.
Tony Boydell, 2013
Components
1 x 18 card deck containing:
-
1 scenario description card
-
1 new Train (not available at Yucata)
-
7 new Canal Track cards
-
1 new action space card
-
8 new Station cards
1 x rules for the scenario
Playing this scenario
Playing this scenario is the same as for the basic game (Mount Snowdon)
with the following changes:
-
Daffodil collection for end game scoring
-
Filling in the canal in addition to excavating rubble
-
Smashing up stone to create rubble at the Works.
The Daffodil Line notes on card effects
-
Contract Card 3: treat this as if it said: “…excavate or fill
in completely the next valid excavation space”. This will
let you ‘fill in’ an entire Canal Track card with rubble.
If you do not have enough rubble to ‘fill in’ the entire Canal
Track, spend all the rubble you have.
-
Cards 26 and 30: treat this as if it said “…take and/
or place double the number of Rubble cubes”.
-
Train No.1 L.A.D.A.S lets you put up to two extra rubble on
to Canal Track cards as well as its basic game ability.
-
Train No.8 Snowplow lets you put up to one extra rubble
on to Canal Track cards as well as its basic game ability.
(Train not available at Yucata)
Note: for the cards above you need to have the rubble to put on to Canal
Track cards in your personal supply.
Setting up
Put station 1 (Ledbury) on top of Llanberis. Lay out
the other 7 stations as for the basic game.
Shuffle the Track cards from the basic game and place
the appropriate number, chosen at random, before Skew
Bridge, Dymock and Gloucester. Put rubble on these
cards and on all of the excavation spaces in stations.
Shuffle The Daffodil Line Canal Track cards and place
the appropriate number between the other stations.
Do not place rubble on the Canal Track cards.
Set the Yellow marker pieces aside – these are not used as
player pieces in this scenario. Instead they are used to represent
daffodils that are gained by doing work during the game.
Put the new version of the [C] Works action on to the board
with the correct side for the number of players showing.
Playing the Game
Daffodils
Some station spaces and excavation spaces have daffodils
printed on them. When you complete these spaces, you
immediately take 1 Yellow marker and put it into your personal supply.
Daffodils are scored at the end of the game.
Gloucester: Daffodil spaces (trading away collected daffodils)
If you want to build in one of these spaces, return the stated number of
daffodil pieces to general supply and place your marker in the space.
Excavation and filling in the canal
Some parts of an excavation action will require you to put
rubble from your personal supply back on to a Track card.
For Track cards from the basic game, remove rubble cubes
as usual. The new Canal Track cards start with no rubble
on them and must have rubble pieces placed on them
before track can be laid.
When you resolve an excavation action that moves to a Canal Track card,
each unit that would normally remove a cube must now be used to put
rubble on to the Canal Track card from your personal supply. You must
do this if you have rubble available and have an excavation action in
progress. If you no longer have any rubble, then your excavation action
ends immediately.
Each Canal Track card has a number on it that denotes how much rubble
is needed to fill in the abandoned canal. The player who puts in the last
piece of required rubble to complete a Canal Track card takes a Yellow
daffodil marker. You cannot lay track on a Canal Track card until it has
rubble on it equal to the number on the card. You cannot add rubble in
excess of the number on the Canal Track card.
Excavation Events
If the game excavates as an Event, treat Canal Track cards like normal
cards for the number resolved, but fill them with rubble from general
supply, one card per Work Rate. It is, of course, possible, for an Event or
player excavation to be a mix of taking rubble off and putting it back on.
If the game lays track as an Event, clear off any rubble already collected
or add rubble to fill canal spaces as appropriate, and flip the card as in
the basic game.
Works
The Works action [C] now has a third option for you to use: “stone
breaking”. You may trade 1 Stone from your personal supply (put it into
the bag) and take 2 rubble from general supply. You may mix and match
the three options as you choose when resolving this action.
Using the action space does not have to result in a different resource
count for you, so for example it is allowed to trade a stone into 2 rubble,
and then 2 rubble back into a stone.
Scoring
The steel bar station spaces on station 7 (Over Junction) count towards
track-laying Contract Card bonuses, but not ‘station building’ bonuses.
Game End:
Surveyor
If your surveyor is on station 3 (Dymock) or station 7 (Over Junction) at
the end of the game, take 1 Yellow marker from general supply before
scoring.
Note that it is intentional that both stations provide the
same benefit, even if station 7 is much further along the track.
Depending on the number of daffodils that you have collected, it
could still be worthwhile to move your surveyor from station 6
to station 7.
Scoring daffodils
After you have scored all of the elements from the basic game, you must
score daffodils. Scoring applies to sets (or part sets) of four daffodils at
a rate of 3/9/19/34 points for 1/2/3/4 daffodils. If you have more than
four daffodils, then start a new set for scoring one to four daffodils. For
example six daffodils would score you 34+9 = 43 points.
Final Note: The Yellow markers representing Daffodils are not a fixed
limit (though there SHOULD be enough!). If you run out, use an
alternative, preferably yellow, type of marker.
Appendix
Trains
Trains cannot be acquired by any player until the “Trains may
now be acquired” Event has occurred. Once this event has occured
the Build action can be used to buy a train.
If a player decides not to pay the upkeep of a Train
(see Resolving Events), return the Train card to the
Engine Shed.
A player may not own more than one Train. A player can return
a Train card to the Engine Shed during a Build action when
buying a different Train. Put more Coal from the Supply Bag
(if available) on the returned Train card, as indicated on
the card.
You don't need a train to win (but it often helps)!
No.1 L.A.D.A.S.
Cost: 2 Steel Bars
Comes with 1 Coal
You may pay 1 Coal at the start of a
round to gain 1 Temporary Labourer
for the round.
Whenever you take the Excavation
action, you excavate at 2 above the
current Work Rate. The total can
exceed the maximum rate printed on
the board.
No.2 Enid
Cost: 2 Steel Bars
Comes with no resources
You may pay 1 Coal at the start of a
round to gain 1 Temporary Labourer
for the round.
Whenever you take the Works
action, you can convert 2 Iron Ore
into 1 Steel Bar. Normally, this would
cost 3 Iron Ore.
No.3 Wyddfa
Cost: 2 Steel Bars
Comes with 1 Coal
You may pay 1 Coal at the start of a
round to gain 1 Temporary Labourer
for the round.
Whenever you take the Stock Yard
action, you may take 1 additional
cube. You may still not take more
than 1 Coal per action.
No.4 Snowdon
Cost: 1 Steel Bar
Comes with 1 Coal
You may pay 1 Coal at the start of a
round to gain 1 Temporary Labourer
for the round.
At the end of the game, you score an
additional 9 victory points.
No.5 Moel Siabod
Cost: 1 Steel Bar
Comes with 2 Coal
You may pay 1 Coal at the start of a
round to gain 1 Temporary Labourer
for the round.
No.6 Padarn
Cost: 2 Steel Bars
Comes with 1 Coal
You may pay 2 Coal at the start of a
round to gain 1 Temporary Labourer
for the round.
At the end of resolving the Build
Action Area, if at least 1 Build action
was taken this round, by any player,
you may take an additional Build
action.
No.7 Ralph
Cost: 2 Steel Bars
Comes with 1 Coal
You may pay 1 Coal at the start of a
round to gain 1 Temporary Labourer
for the round.
Whenever you take the Lay Track
action, you lay track at 1 above the
current Work Rate. The total can
exceed the maximum rate printed on
the board.
Contract cards
Condition: Have 5 ownership markers on stations.
Reward: Score 15 points.
When activated:
Whenever you take the
Lay Track Action this Round,
you do it at one more than
the current Work Rate.
Condition: Have 4 ownership markers on stations.
Reward: Score 10 points.
When activated:
Whenever you take the
Lay Track Action this Round,
you do it at one more than
the current Work Rate.
Condition: Have 3 ownership markers on stations.
Reward: Score 6 points.
When activated:
After all other Excavate Actions
have been resolved, you may
excavate completely the
next space with Rubble in it (Track card or Building site).
Condition: Have 2 ownership markers on stations and 2 ownership markers on tracks.
Reward: Score 17 points.
When activated:
Swap the Weather disc in
the middle position on the
Weather Track with
one of your choice from
general supply.
This weather will be used at
the start of the next Round
Condition: Have 2 ownership markers on stations, 1 ownership marker on tracks and 4 rubble.
Reward: Score 14 points.
When activated:
Draw the top two cards from
the Contract Card Deck. You
may keep this card or one of
the cards you have drawn.
Discard the other two cards.
Condition: Have 12 rubble and 1 ownership marker on tracks.
Reward: Score 22 points.
When activated:
Whenever you take a
Build Action E this Round,
you may use 3 Iron Ore
as if it was a Steel Bar.
Condition: Have 8 rubble.
Reward: Score 11 points.
When activated:
Whenever you take a Stock
Yard Action this Round, you
may take two additional
cubes (the one Coal per
Labourer limit still applies).
Condition: Have 8 rubble.
Reward: Score 11 points.
When activated:
After all other Lay Track
Actions have been resolved,
you may take a Lay Track
Action as if you had placed
a Labourer here this Round.
Condition: Have 6 rubble and one ownership marker on tracks.
Reward: Score 14 points.
When activated:
Whenever you pay
a Stone requirement for
a Building site this Round,
pay one Stone less.
Condition: Have 4 rubble.
Reward: Score 5 points.
When activated:
After all other Build Actions
have been resolved, you
may take a Build Action
as if you had placed a
Labourer here this Round.
Condition: Have 4 rubble.
Reward: Score 5 points.
When activated:
Immediately convert
2 Rubble in your personal
supply into 1 Stone
up to 3 times. Take the
Stone from the Supply Bag.
Condition: Have 12 rubble.
Reward: Score 16 points.
When activated:
Immediately convert
2 Iron Ore from your
personal supply into
1 Steel Bar once or twice.
Put the Iron Ore into the Bag.
Condition: Have 4 rubble and 2 ownership markers on tracks.
Reward: Score 18 points.
When activated:
After this card has
been played, no
other Contract
cards may be
played for the
rest of the Round.
Condition: Have 4 rubble and 1 ownership marker on tracks.
Reward: Score 11 points.
When activated:
Whenever you pay
a Stone requirement for
a Building site this Round,
pay one Stone less.
Condition: Have 8 rubble and 1 ownership marker on tracks.
Reward: Score 17 points.
When activated:
Whenever you pay
a Stone requirement for
a Building site this Round,
pay one Stone less.
Condition: Have 8 rubble and 2 ownership markers on tracks.
Reward: Score 23 points.
When activated:
You may discard this card
instead of a Steel Bar
when required to pay
for train maintenance.
Condition: Have 16 rubble.
Reward: Score 21 points.
When activated:
Whenever you take a Build
Action E this Round, you
may use 2 Rubble as 1 Stone
or 4 Rubble as 2 Stone.
Condition: Have 11 rubble.
Reward: Score 14 points.
When activated:
Immediately draw three
cubes from the Supply Bag;
return each Event cube
drawn in this way.
Condition: Have 7 rubble.
Reward: Score 10 points.
When activated:
Immediately draw three
cubes from the Supply Bag;
return each Event cube
drawn in this way.
Condition: Have 5 ownership markers on tracks.
Reward: Score 40 points.
When activated:
Immediately take
any 2 cubes from
the Stock Yard
(one Coal maximum).
Condition: Have 3 ownership markers on tracks.
Reward: Score 24 points.
When activated:
You may discard this card
instead of a Steel Bar
when required to pay
for train maintenance.
Condition: Have 3 ownership markers on tracks.
Reward: Score 24 points.
When activated:
Take the Start Player
marker. The marker
cannot move again
this Round.
Condition: Have 4 ownership markers on tracks.
Reward: Score 31 points.
When activated:
Immediately take
any 2 cubes from
the Stock Yard
(one Coal maximum).
Condition: Have 1 ownership marker on tracks.
Reward: Score 4 points.
When activated:
Immediately convert
2 Iron Ore from your
personal supply into
1 Steel Bar once or twice.
Put the Iron Ore into the Bag.
Condition: Have 1 ownership marker on tracks.
Reward: Score 7 points.
When activated:
Whenever you take a Build
Action E this Round, you
may use 3 Iron Ore as if
it was a Steel Bar.
Condition: Have 2 ownership markers on tracks.
Reward: Score 15 points.
When activated:
Whenever you take the
Excavate Action this Round,
take double the number
of Rubble cubes (Work Rate
plus any bonuses).
Reward: Score 2 points for each remaining coal.
When activated:
Immediately move
your Surveyor 1 Station
further along.
Condition: Have 5 ownership markers on stations, and your surveyor has reached at least station 6.
Reward: Score 23 points.
When activated:
Immediately move one
of your placed Labourers
to any different, empty
Action space.
Reward: Score 6 / 10 / 15 points if your surveyor has reached station 5 / 6 / 7.
You may ignore the limit
on taking Coal from the
Stock Yard this Round.
Condition: Have 2 ownership markers on tracks.
Reward: Score 15 points.
When activated:
Whenever you take the
Excavate Action this Round,
take double the number
of Rubble cubes (Work Rate
plus any bonuses).
Player info
The player infos are shown in turn order (with the "own" player info on top).
Left of the name of the starting player the string "(S)" is displayed.
The first line of the player info shows the current points from the
placed ownership markers, the number in brackets gives the final points
under the assumption, that the game ends in this moment. This final point
value is calculated as the sum of the points for ownership markers, the
points for the surveyor, the points for contract cards and the points
for the Train No. 4 (Snowdon).
The second line in the player info shows the resources available to the
player (from left to right: labourers, ownership markers, iron, stone, coal, rubble and steel bars).
For the starting player there is a black train icon to the right of the
resources.
The third line of the player info shows the train (if the player owns one)
and next to it the number of contracts owned by the player. If you click on
the card symbol, a dialog opens which shows the contracts of the player
(broken down into unused contracts, active contracts and used contracts).
For each contract it shows how many points it is currently worth.
Contracts
To gain the points for a contract, you need to assign the required
resources (or use the position of the surveyor), and you cannot
use something for more than one contract. Therefore in the real game
you have to choose which contracts you want to fulfill in order
to get the most points. Yucata automatically chooses optimally for
the player.
Resources in the supply
On the left side of the game board you can see inside a dashed box
which resources are currently in the bag, and under it how many
steel bars are in the supply. Important: If there is e.g.
no stone left in the bag, you cannot perform the action to convert
rubble into stone.
Unusable actions
At the beginning of the game, you cannot buy a train yet. Therefore
the action space will show a red cross on top of the corresponding
symbol. Also, the train cards are shown somewhat transparent.
Also it can happen that it is not possible to convert rubble into
stone, because there is no stone in the bag, or no iron can be
converted into steel bars, because there are no more steel bars
in the supply. In these cases, there will also be a red cross on top
of the corresponding symbols on the action space. Theoretically it
can happen that the required resource is returned to the supply
before the conversion action is performed, so you should think
yourself whether it makes sense to place a labourer on the
action space or not.
Contract card piles
The discard pile and the draw pile for the contract cards
shows in the lower right corner, how many cards are in the
pile, respectively. If you click on the number, a dialog
is opened which shows the individual cards (for the draw pile
in sorted order from #1 to #28, for the discard pile
from bottom to top).
Help texts for contract cards
In dialogs showing the contract cards, the help texts from the
rules are also displayed next to each contract. Loading
the rules can take a few seconds. If you don't need the help
texts and you prefer a faster loading dialog, you can disable
the setting "Show contract cards with help text" in the side
panel (tab with the heart icon).
Coal
If you return a train, according to the rules, the coal coming
with the train should be refilled from the bag. If this is
not (or only partially) possible, the next time if someone pays
coal, the missing coal is placed on the train card. If someone
buys the train that is missing some coal, the missing coal
will be taken from a different train (if possible). To simplify
things, on Yucata it does not show whether there is coal on a
train or not. In the unlikely case that the missing coal
cannot be replenished you can see when buying the train that
you got no (or not enough) coal.