
In Botanicus, you are creating your own botanical garden. Hire a gardener and then set out to
find the most beautiful plants in the world. But don’t plant them just anywhere! Your visitors have
high standards and very specific expectations of what they’d like to see.
Will your garden outshine all the others?
 Contents
About this rulebook
Examples and special cases are written in italics. You can ignore special cases for now;
they are only intended to answer specific questions.
We use the word Important to indicate particularly important rules.
If in doubt, check these first!
Botanicus includes a base game  and an Expert variant
  .
Once you’ve played the base game a few times, you can consult the
Expert Rules
for an extra challenge.
.
Once you’ve played the base game a few times, you can consult the
Expert Rules
for an extra challenge.
Enjoy your garden!
Here we describe the general setup for the base game with 4 players.
For your personal setup see here .
Changes for playing with 2 or 3 players are indicated in italics.
Changes for the Expert variant are described in the
Expert Rules.
1 Place the game board in the center of the table, with
this symbol in the upper right corner.
2 Each player takes a Garden tableau and places it in front
of them, with this symbol in the lower right corner.
|
4 Sort the 16 Flower tiles by pattern.
There are
8 spotted and 8 striped Flower tiles.
|

spotted striped

front (light) back (dark)
|
5 Sort the Prize tokens by shape. The round ones
 are for the
upper track on the game board, and the square ones
are for the
upper track on the game board, and the square ones
 are for
the lower track.
are for
the lower track.
-
Sort the Prize tokens into 2 stacks from highest to lowest value
(highest on top) and place them next to the space on the right of
their respective track.
-
Then take the top Prize token of each stack and place it on the space
to its left.
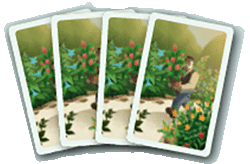
6 Shuffle the 18 Garden cards and place them in a face-down
pile next to the game board.
You won’t need the 12 Final Scoring cards for the
base game, so return them to their tuck box.
7 Sort the Plants by level (from I to IV) and place them next to
the game board within easy reach of everyone.
8 Place the Coins in a pile next to the game board to form
the Bank.

|
Hint: We recommend putting approximately half of the Plants
and half of the Coins on either side of the game board, to
ensure that everyone can easily reach them.
|
|
|
|
1 Game board
|
4 Garden tableaus
|
|
|
|
18 Garden cards
|
12 Final Scoring cards
|
|


|
|
69 Coin tokens
|
16 Flower tiles
|
|

|
|
12 Prize tokens
|
4 Flowers
in 4 colors
|

|

|
|
12 Gardeners
in 4 colors
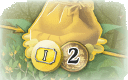
|
4 Money Bags
in 4 colors
|

|

|
|
4 Wheelbarrows
in 4 colors
|
4 Shovels
in 4 colors
|
|
|
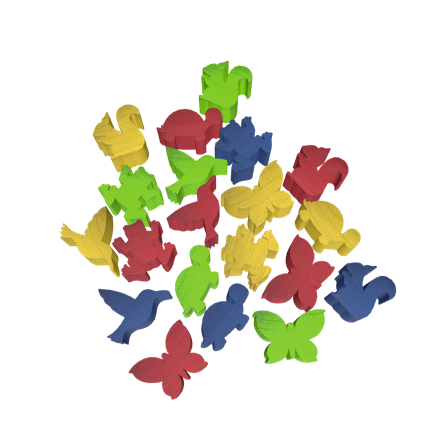
20 Animals
in 4 colors
|
|
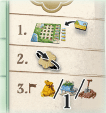
1 Shuffle the 20 Special tasks face down, then give
5 at random to each player.
Reveal the tasks and place them to the right of your
Garden so that there is 1 Special task next to each row.
Don’t worry about the order of the tasks; you can still
change it later
(see Getting Ready).
|

back
front
|
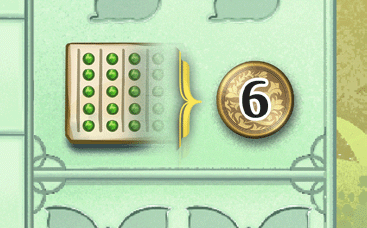
2 Take Coins with a total value of 6 from the Bank.
3 Place your wooden pieces as follows:
 4 Place your Action Flower (or “Flower”, for short) on the
starting space of the Actions area on the game board.
4 Place your Action Flower (or “Flower”, for short) on the
starting space of the Actions area on the game board.
Form a stack of all the players’ Flowers. The icon
in the lower right of your Garden indicates your
Flower’s position in the stack.

 In our setup, the red player has the
Garden with this position.
In our setup, the red player has the
Garden with this position.
 Then the green Flower is placed on
top of it.
Then the green Flower is placed on
top of it.
 Then the yellow one.
You place your Flower at the top of
the stack, as shown on your Garden.
Botanicus is a competitive game in which you take turns one after another, but not in clockwise order.
Your goal is to achieve more Victory Points  than your opponents by completing tasks, advancing along the tracks,
and cultivating a beautiful garden for final scoring.
than your opponents by completing tasks, advancing along the tracks,
and cultivating a beautiful garden for final scoring.
Your Garden consists of rows and columns of Flower beds. This is where
you grow your Plants.
-
Planting actions allow you to place a Plant token onto one of your
Flower beds. We’ll explain this in more detail later
(Planting Actions).
-
You can only ever work on the Flower beds around your Gardener.
They can
only ever reach the Flower beds that are diagonally adjacent.
This applies to all actions that involve Plants.
-
You can move your Gardener at the start of your turn, or via special actions.
Your Gardener moves from one footprint to the next between the Flower beds.
More on this in Your Turn and Actions.
Rows
Columns
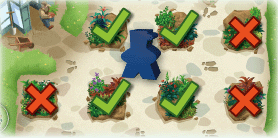
Your Gardener is standing here.
This means you can perform
Plant related actions on these
4 Flower beds.
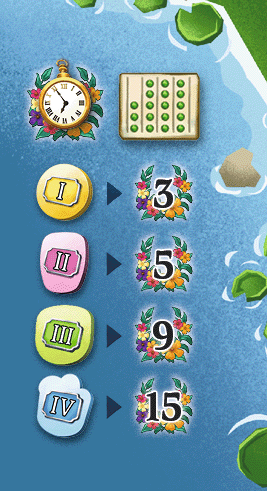
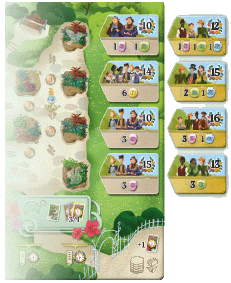
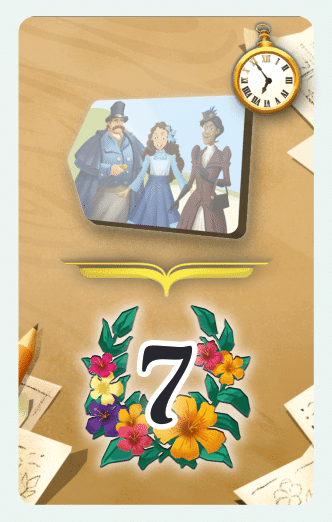
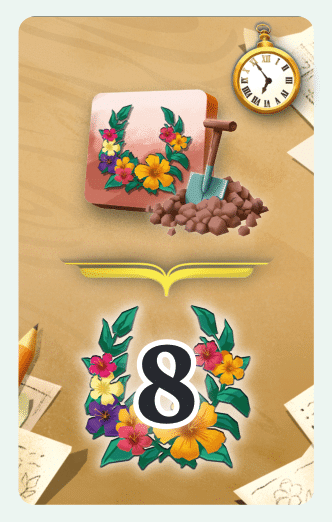
The tasks represent the visitors coming to your botanical garden. They have very specific expectations of what they want to see, and they are only
happy if you fulfill their wishes. But if you do, they’ll shower you with praise (and with Victory Points).
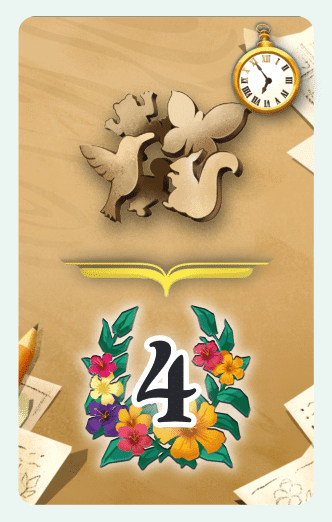
Each task shows the combination and number of specific Plants required to complete that task.
Each task is assigned to a row of Flower Beds.
To complete a task, that row must contain exactly the Plants shown.
The position of the Plants
within the row doesn’t matter.
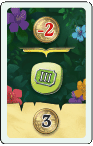
As soon as the requirements are met, you immediately score the Victory Points depicted.
You can only complete each task once.
Victory Points
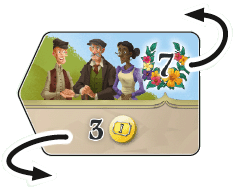
Requirements
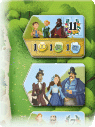
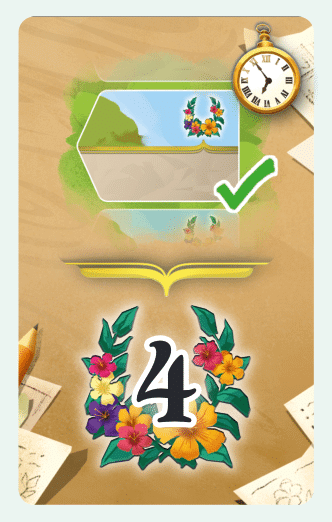
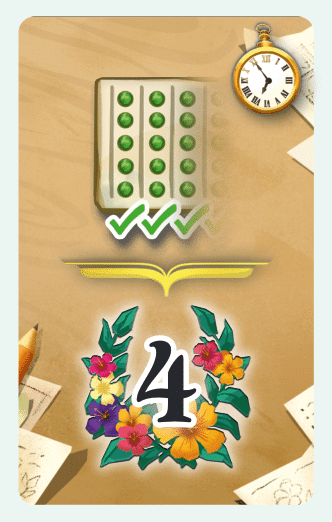
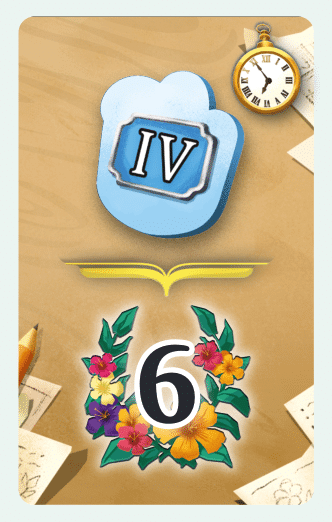
Every row of Flower beds is assigned 1 Basic task and 1 Special task.
For each row, you first have to complete the Basic task shown on your Garden tableau.
As soon as you do, cover it with the Special task next to it.
From now on, that Special task
is considered active and can be completed.
You can complete your active tasks in any order.
You can choose yourself which Special task is assigned to which row at the start of the game
(Getting Ready).
Basic Special tasks
tasks tasks
(inactive)

When you complete a Special task, flip it over.
Well done! Your work is done here. Now you can jump to another task!
Special case: Sometimes, you will complete a task in between actions. In that case, first resolve the task
before proceeding with the remaining actions. It is possible to complete multiple tasks during a single turn
this way.
 Special
task
(active)
All done!
Example: You place a level II Plant  .
This completes the Basic task in
this row. Score 7 Victory Points and cover the task with the Special task
next to it.
.
This completes the Basic task in
this row. Score 7 Victory Points and cover the task with the Special task
next to it.
On a later turn, you place a level III Plant  in this row, completing the
Special task. Score the 15 Victory Points and flip it over.
in this row, completing the
Special task. Score the 15 Victory Points and flip it over.
Now, let’s take a look at what your turn actually looks like!
So how do you go about planting, watering, and all the other great stuff?
Your turn always consists of 2 phases. There is a short overview of these phases on the upper left corner of your Garden.
Move your Gardener and / or play 1 Garden card (in either order)
 At the start of your turn, you can move your Gardener in your Garden.
Your Gardener always moves from one footprint.
to the
next. They can only move along the paths, not diagonally.
(No hopping over the Flower beds!)
At the start of your turn, you can move your Gardener in your Garden.
Your Gardener always moves from one footprint.
to the
next. They can only move along the paths, not diagonally.
(No hopping over the Flower beds!)
You can move your Gardener any number of spaces, but
each step costs 1 Coin.
If you have no Coins, you can’t move your Gardener.
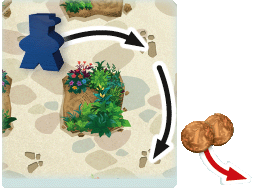
You move
your Gardener
2 spaces. This
costs you
2 Coins.
You can also play exactly 1 Garden card from your hand.
When doing so, you always have 2 options:
|
 Cost
Cost
Action
Sell card
|
-
If you want to use the card’s action (in the center
of the card), you have to pay 2 Coins. Then you
immediately perform the action.
-
Instead, you can choose to “sell” the card. In that
case, you do not perform the action and instead
gain 3 Coins.
|
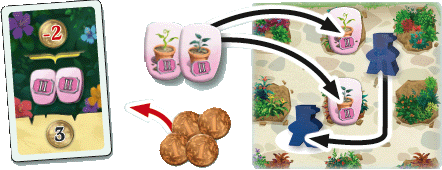
First, you play this card, pay 2 Coins, and
plant 2 level II Plants within range of your
Gardener. Then you spend another 2 Coins to
move your Gardener to this space.
After you play a Garden card, place it face up on a discard pile.
You can perform the Move and Play a Garden card actions in
either order. You
can also perform only one action, or neither. However, you must always
complete one action before starting the other.
Then move on to Phase 2:
2. Place your Flower and perform the depicted action
 You must always place your Flower on a Flower space in the next column.
Then you immediately perform the depicted action
(more on that in Actions).
You must always place your Flower on a Flower space in the next column.
Then you immediately perform the depicted action
(more on that in Actions).
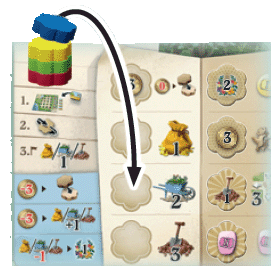
Every second row has Flower tiles on the Flower spaces. When you place your
Flower there, perform both the action on the tile (which your Flower is covering)
and the action depicted next to it.
You can choose the order in which to perform the actions.
Note: The Flower tile stays in place. You simply place your Flower on top of it.
Flower space
Flower space
with Flower tile
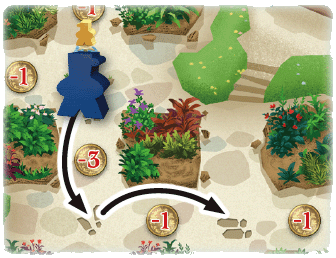
 If a Flower space already contains one or more Flowers, you can still
place your Flower there and perform
the action depicted next to it.. However, you must pay 3 Coins into the bank
per Flower already in that
space. Then place your Flower on top of the Flower(s) already there.
If a Flower space already contains one or more Flowers, you can still
place your Flower there and perform
the action depicted next to it.. However, you must pay 3 Coins into the bank
per Flower already in that
space. Then place your Flower on top of the Flower(s) already there.
Note: There is a reminder on the left side of the game board.
Important: When you place your Flower onto an
occupied space in a column with Flower tiles
you only perform the action that is next to the tile.
Only the first player to place their Flower on a tile gets to perform
the action that is on the tile.
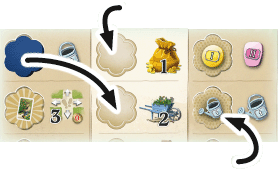
It’s your turn first and you place
your Flower onto this space. You perform
the depicted action
(Watering) and the
action on the
Flower tile (in this case:
Drawing a Garden card).
Later, the yellow player places
their Flower on the same space.
Yellow pays
3 Coins into the
Bank and performs only the depicted action
(Watering).
When is it your turn? In Botanicus, you don’t take your turns in clockwise order.
The order of play is determined by the order of your Flowers
on the game board. Whichever Flower is at the top of the
last played column indicates which player’s turn it is.
We call this the “at-the-top rule”.
What does “at the top” mean?
The position of the Flower space and the order the Flowers are stacked determines whose turn it is.
1. Position of the Flower spaces
 Each column has 4 Flower spaces. The player whose Flower is in the
topmost Flower space takes their turn next.
Only consider the column for which all players have already taken a turn.
Each column has 4 Flower spaces. The player whose Flower is in the
topmost Flower space takes their turn next.
Only consider the column for which all players have already taken a turn.
The next player to take their turn is the one whose Flower is now in the topmost Flower space, and so on.
2. Order within the stack
 It is possible for more than one Flower to be stacked on top of each other (like at the start of the game).
The turn order among these players is determined by whose Flower is higher up in the stack.
It is possible for more than one Flower to be stacked on top of each other (like at the start of the game).
The turn order among these players is determined by whose Flower is higher up in the stack.
Important:: The turn order is determined by the position of the Flower space first, and only then by the order they are stacked.
Proceed like this until everyone has taken one turn, i.e. until
all Flowers are in the next column.
Only then do you begin again with the player whose Flower is at the top.
Note: This can lead to a player taking two turns in a row.
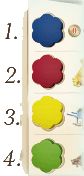
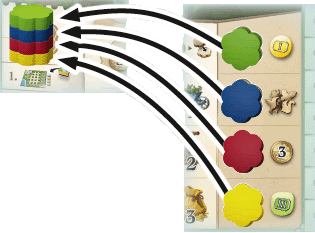
At the start of the game, all the Flowers
are in the same space. Your blue Flower
is at the top, so
you go first by
placing your Flower
on a Flower space
in the first column and performing the
action. Then
Yellow,, Green
and Red take their turns, in that order.

Red chose the top Flower space and
thus is next to take their turn. Then it
is Yellow's turn because their Flower
is stacked on top of yours.
You go
next, and finally
Green takes their
turn.
Changes for 2 players
In a 2-player game, you play with an additional Flower.
It is neutral and always occupies 1 Flower space.
The player who is first to take their turn starts by placing the neutral Flower on a
Flower space of their choice.
Then they take their own turn. You treat the space with the neutral Flower as occupied, as if there were a third player.
 A game of Botanicus has 3 stages. There is a reminder in the bottom left of the game board.
 First, assign the 5 Special tasks you received during game setup to your Basic tasks. Place the Special tasks
next to your Garden so that each Special task is clearly matched with 1 Basic task.
First, assign the 5 Special tasks you received during game setup to your Basic tasks. Place the Special tasks
next to your Garden so that each Special task is clearly matched with 1 Basic task.
You can find out more about tasks in Tasks.
Reminder: You can only complete a Special task once you have completed the Basic task for that row.
Try looking for similarities when assigning your Special tasks.
Note: Some tasks require 4 Plants in a single row. That won’t be possible in some rows.
|
Then you begin Round One, by taking your turns as described above.
Once all your Flowers have reached the
final column, Round One ends.
Then stack all the Flowers (maintaining their current order) and return
them to the starting space.
|

Starting space
|
Stack the Flowers on the starting space in
the same order.
2. Round Two
 Before you start Round Two, flip over all the Flower tiles.
All the tiles stay in the same place but now the dark
side is facing up. This changes the actions available.
Before you start Round Two, flip over all the Flower tiles.
All the tiles stay in the same place but now the dark
side is facing up. This changes the actions available.
Then continue playing as in Round One, until all Flowers have reached the final column again.
After Round Two, just like after Round One, return all flowers to the starting space,
again maintaining their current order.
3. Last action and final scoring
 Now all players (in order) take 1 final turn, taking 1 action on one of the 3 tracks.
Important: This is a normal turn. You can still start your turn by moving your Gardener and/or playing
1 Garden card. You can also spend Coins to move more than 1 step on the track
(more on that at Tracks).
 Now you’ve reached the end of the game and it’s time for final scoring.
Starting with the player with the fewest
Victory Points, each player scores the columns of their Garden.
Now you’ve reached the end of the game and it’s time for final scoring.
Starting with the player with the fewest
Victory Points, each player scores the columns of their Garden.
You score points for each column that is completely filled with Plants.
Only count columns in which every Flower bed contains a Plant.
In those columns, look for the highest level Plant and score it.
 Your Garden tableau will tell you how many points you score
for it. You only score each column once, no matter how many
Plants of the highest level you have there.
Your Garden tableau will tell you how many points you score
for it. You only score each column once, no matter how many
Plants of the highest level you have there.
Example: A column filled entirely with level III plants scores the same
amount as a column with 1 level III Plant and the rest at level I.
Finally, score 1 Victory Point for every 3 Coins you have.
After final scoring, whoever has the most Victory Points is the winner.
In the case of a tie, victory is awarded to the player whose Flower is
higher up in the stack (or whoever is first to name 4 plants by their Latin name).
Congratulations!
Many actions in this game will allow you to perform more actions. We call that “gaining actions”.
When you gain more than 1 action, you can choose in which order to resolve them. You must completely resolve one action
before beginning the next. You can always forfeit actions, i.e. take less or take nothing.
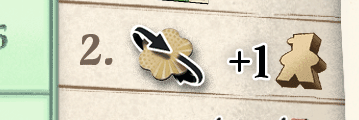
Special case: Instead of 2 ,
you can choose to take only 1 .
You cannot, however, take 1
and 1  .
.
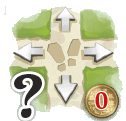
The game board has 3 tracks: Money, Wheelbarrow, and Shovel. Those are the main actions.

|
 These symbols always have a number on them. When you gain one of these
actions, the number indicates how many steps (maximum) you can take along
the track shown.
These symbols always have a number on them. When you gain one of these
actions, the number indicates how many steps (maximum) you can take along
the track shown.
-
You always gain all the actions of the space where you
end your movement, never those on the
spaces in between. It doesn’t matter whether the space
is also occupied by another player’s piece.
-
If the space shows more than 1 action, you can
choose the order in which you resolve them.
-
You must always move your piece
at least 1 space in order to gain an action.
The Shovel track contains some paths that
cost Coins. To use these tracks, you have to pay the cost. If you can’t,
then you cannot move there.
|
Action
|
|
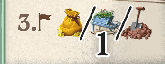
You can take 2 steps along the Shovel track. For the second step, you have to pay a cost
of 2 Coins to the Bank, as shown on the path. After that, you take
2 level I Plants .
If
you can’t pay the cost, you can instead take just 1 step (or maybe choose a different action
altogether with your Flower).

|
If you want to move further than indicated by the action,
you can buy additional steps. Each additional step will cost you
3 Coins. A reminder is printed on the game board.
Note: Costs printed on the paths obviously still apply in addition to the cost for additional steps.
|

|
You can also move fewer steps than indicated.
For each step “wasted” like this, you immediately score 1 Victory Point.
|
You may take 1 step along the Money track.
You pay 3 Coins for 1 additional step, giving you a total of 2 steps.
You choose the lower path and gain 2 Coins and 1 Garden card.
If you reach the last space of a track, you have to
stop there. You still score 1 Victory Point per “wasted” step, as usual.
 After gaining the actions depicted on the space (i.e. after finishing your action),
move your piece back to the starting space
of the respective track. The next time you move along this track, you’ll be starting from the
beginning again.
After gaining the actions depicted on the space (i.e. after finishing your action),
move your piece back to the starting space
of the respective track. The next time you move along this track, you’ll be starting from the
beginning again.
Note: The last space of the Money and Shovel tracks give you a Prize token as
a reward (Victory Points and Prize Tokens).
You can take 3 steps along the Wheelbarrow track. After 2 steps,
you’ve already reached the last space and have to stop. As usual,
you score the 7 Victory Points depicted, plus 1 additional Point
for the wasted step. Then you perform the Watering action twice.
Finally, you move your Wheelbarrow back to the track’s starting
space. Then it’s the next player’s turn.
Now we’ll explain each action in detail:
Coins
|
 You gain that amount of Coins.
Add them to your personal supply.
You gain that amount of Coins.
Add them to your personal supply.
|
 You have to
pay that amount of Coins.
You have to
pay that amount of Coins.
|
Coins are always gained from and paid into the bank.
The values on the Coin tokens show how many Coins that token is worth.
There are 4 levels of Plant: I, II, III, and IV.
|
Level I Plants are
plant seeds.
|
Level II Plants
are seedlings.
|
|
Level III Plants are
maturing plants.
|
 Level IV Plants are
in full bloom.
Level IV Plants are
in full bloom.
|
You take the Plant depicted and immediately place it on one of the
Flower beds in your Garden.
Reminder: You can only plant them in Flower beds within range of your Gardener
(Your Garden Tableau).
Special case: If there are no Plants of the depicted level available, take a different Plant and rotate it by 90 degrees. As soon as the level of Plant
you need becomes available again, you can substitute it in.

|
You water 1 Plant of your choice, limited to those within range of your Gardener, as usual. Return the Plant token
to the general supply and replace it with a Plant of the next level up.
The Plant stays in the same Flower bed.
If you gain multiple Watering actions, you can
split them between multiple Plants, or water
the same Plant more than once.
You cannot water level IV Plants .
|
Moving your Gardener
 This action allows you to move your Gardener for free.
You can move them by as many spaces as indicated in the
lower left corner. This movement costs no Coins.
This action allows you to move your Gardener for free.
You can move them by as many spaces as indicated in the
lower left corner. This movement costs no Coins.
Reminder: Normally (in the base game), moving your Gardener costs 1 Coin per step
(see Your Turn).
You can also move your Gardener fewer spaces, but you do not get a reward for wasted movements.
Important: You can never take other actions in the middle of movement. The Gardener’s move action must be completely
resolved before you start your next action.
Drawing a Garden card

|
You gain 1 Garden card. Draw the top card of the pile and
put it in your hand without revealing it to the other
players. There is no maximum hand size..
Reminder: You can only play 1 Garden card at the
start of your turn (see Your Turn).
This means you can never play a Garden card on the same turn you draw it.
Special case: If you cannot draw a Garden card because the pile is empty,
shuffle the discard pile to form a new draw pile.
|
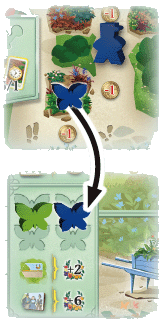
Animals

|
 This action allows you to pick 1 Animal of your color from the supply and place it in your Garden.
In the base game, it doesn’t matter which Animal you pick.
This action allows you to pick 1 Animal of your color from the supply and place it in your Garden.
In the base game, it doesn’t matter which Animal you pick.
Place it on the first empty points space on your Garden tableau and
immediately score the
Points you covered.
Score 3 Points for the first Animal, 6 Points for the second, 10 for the third, etc.
|
You take your bird from the supply. Since the first space is
already covered by your butterfly, you place the bird on the
next space and immediately score 6 Points.
 You immediately score the number of Victory Points depicted.
Advance your Gardener by that many spaces on the Victory Points track.
If you reach 100 Points, tip your Gardener on to its side and simply keep counting from there.
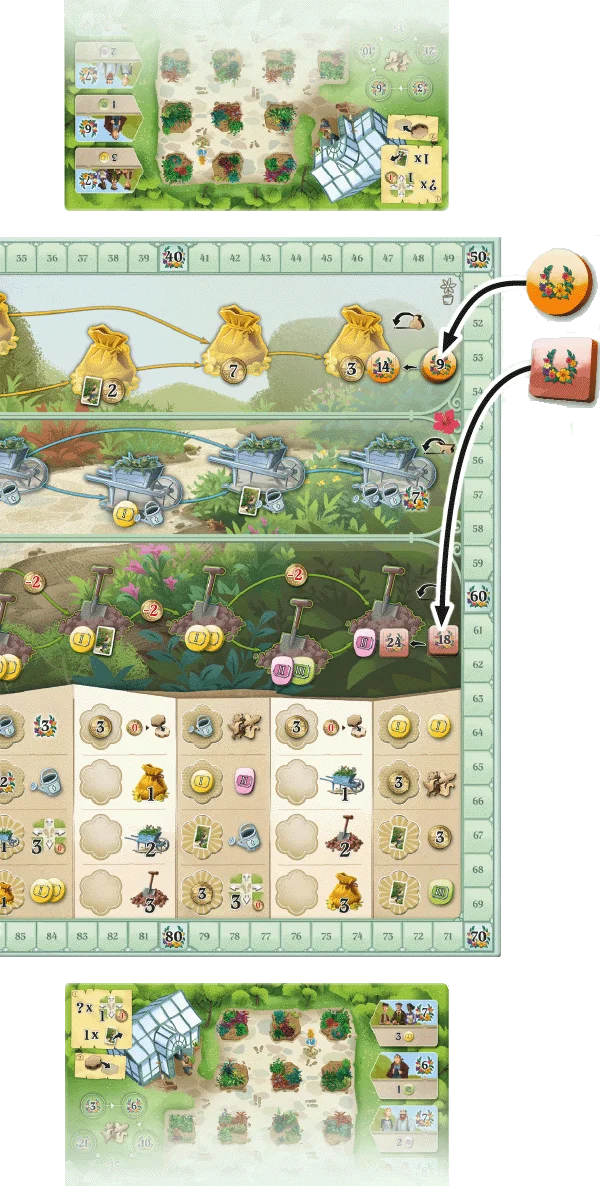
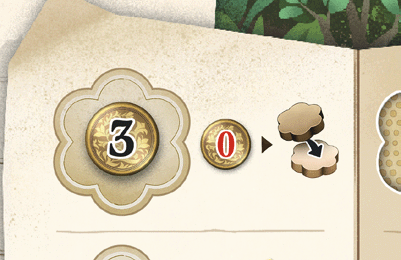
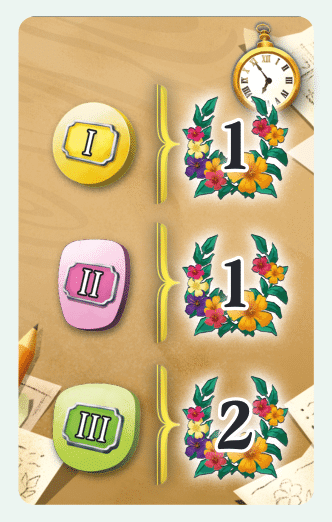
When you reach the end of a track, score the Victory Points depicted on the
Prize token and place the token itself in front of you. It is now no longer
 available for other players to claim.
Then put the next Prize token on that stack in its place.
You can receive multiple Prize tokens from the same track.
Once the stack is empty, you can no longer receive Prize tokens
from that track.
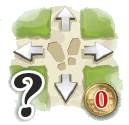
Pole Position
 If you’re the first player to place your Flower on this space, you
gain 3 Coins. As usual, if the space is already occupied, you can
still place your Flower here, but you don’t get the 3 Coins.
If you’re the first player to place your Flower on this space, you
gain 3 Coins. As usual, if the space is already occupied, you can
still place your Flower here, but you don’t get the 3 Coins.
The action next to it means you never have to pay
to place
your Flower here, regardless of whether there are already any
Flowers in this space.
Hint: You can use this space if you’re out of Coins and can’t (or don’t want to) perform any of the
other actions, or if you want to increase your chance of going first in the next column.
Yellow has
already placed
their Flower on
the top space
and gained
3 Coins for it.
Since you want to make sure you
go first in the next column, you also
place your Flower on top of Yellow.
You don’t get anything for it, but don’t
have to pay anything either.
An in-depth look at an example turn

Did you enjoy the game, but now you’re looking for new challenges and a change of pace?
Then you’re ready for the Expert variant. This variant introduces significant changes, so we only recommend playing it once
all the players have already played the base game a few times.
We’ll now explain only the changes compared to the base game. Any rules not explicitly mentioned here will stay the same.
1 Place the game board in the center of the table, with
this symbol showing in the upper right corner.
2 Shuffle the 12 Final Scoring cards and place them
next to the game board in a face-down pile.
 3 Each player takes a Garden tableau and places it in front
of them with this symbol in the lower right corner.
3 Each player takes a Garden tableau and places it in front
of them with this symbol in the lower right corner.
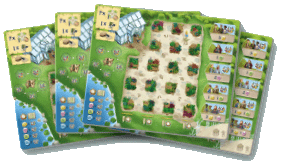
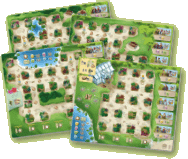
In the Expert variant, each Garden is
different. You can either choose a Garden
or deal them out at random.
Be sure to try them all!
4 Your Gardener now has different starting positions
to choose from. Choose 1 at random and place your
Gardener there (you can still change your mind later).
Place your second Gardener next to your Garden.
Note: Place 1 Gardener on the Victory Points track, as usual.
 5 Instead of placing your Animals next to the
game board, place them directly on the Flower
beds as indicated in your Garden.
5 Instead of placing your Animals next to the
game board, place them directly on the Flower
beds as indicated in your Garden.
Note: The placement of the Animals is different for each Garden.
1. Getting Ready
Final Scoring cards
After all players have assigned their Special tasks, deal
3 Final Scoring cards face down to each player
(including yourself). Each player chooses 1 of their cards and places it face down next to their Garden.
Return the remaining 2 cards to the pile, face down. Then shuffle the pile again.
Note: In a 4-player game, you will be dealing out all the cards. Create a new pile out of the cards not chosen.
You can look at your own chosen card at any time.
Unique Gardens
 Every Garden is now slightly different. One of the Gardens has a slightly different Setup:
It has only 4 Basic tasks. When playing with this garden, assign 1 Special task each of
them as usual, and return the remaining task to the tuck box.
Every Garden is now slightly different. One of the Gardens has a slightly different Setup:
It has only 4 Basic tasks. When playing with this garden, assign 1 Special task each of
them as usual, and return the remaining task to the tuck box.
You also get 1 additional Final Scoring card. In other words, keep 2 of the 3 cards you
were dealt.
Gardener Starting Position
As mentioned earlier, there is more than one starting position to choose from. After assigning your
Special tasks and choosing your Final Scoring card, you may change your Gardener’s starting position.
The other Gardener can take a break until Round Two.
2. Round Two
 At the start of Round Two, flip over all the Flower tiles as usual.
 Additionally, each player now gains their second Gardener. Place them on any empty
starting position in your Garden.
Additionally, each player now gains their second Gardener. Place them on any empty
starting position in your Garden.
From now on, you can use both Gardeners (for more on that, see Your Second Gardener).
3. Final scoring
After scoring the Points for your columns, reveal your Final Scoring card(s).
You will score Points based on how well you fulfilled the conditions shown.
Score the Points once per time you’ve fulfilled the condition.
Here you can find explanations for specific cards that might raise questions:
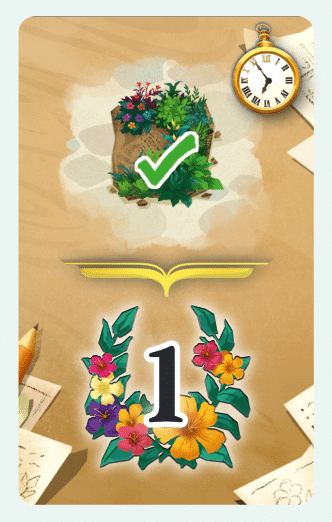
|
You score 1 Victory Point
for each Flower bed with a Plant in it.
|
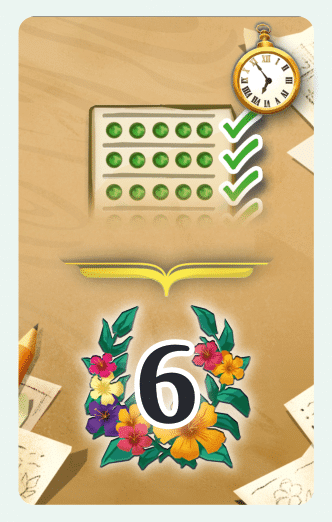
|
You score 6 Victory Points
for
each fully planted row.
|

|
You score 6 Victory Points for each
square of 4 Flower beds with Plants
in them. Each Plant can only be part of 1 square.
|
|
You simply score
12 Victory Points.
|
|
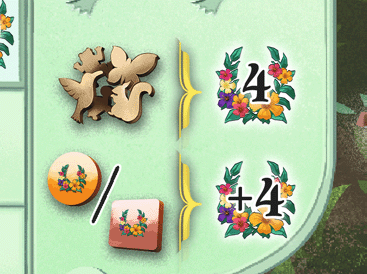
You score 4 Victory Points
for each Basic task you
have completed.
(You can tell which Basic
tasks are completed
because they are covered
by Special tasks.)
|
|
You score 7 Victory Points for each
Special task you completed.
(You can tell which Special tasks
are completed because they are
face down on your Garden.)
|
|
You score 1 Victory Point for each
level I and for each level II plant
in your garden. You score 2 Vicory
points for each level III plant.
|
|
You score 8 Victory Points
for each Bonus you collected
from the Shovel track.
|
|
You score 4 Victory Points
for
each fully planted column.
|

|
You score 7 Victory Points
for each Bonus you collected
from the Money track.
|
|
You score 6 Victory Points for each
level IV plant in your garden.
|
|
You score 4 Victory Points for each
Animal you took care of.
(You can tell which Animals you took
care of because they are
no longer in your Garden.)
|
 When moving your Gardener, you now have to pay attention
to the paths they take.
When moving your Gardener, you now have to pay attention
to the paths they take.
Unlike in the base game, some movements will cost
more than 1 Coin, or nothing at all. The movement costs
are shown in your garden between the footprints.
 If you move your Gardener with this action, it is still free.
Simply ignore the cost printed on the paths in your Garden.
If you move your Gardener with this action, it is still free.
Simply ignore the cost printed on the paths in your Garden.
As usual, 1 movement is always the most direct path from one
footprint to the next.
 You move
your Gardener
twice.
You move
your Gardener
twice.
This costs
 4 Coins.
You may always
split your movement between
your Gardeners, to move both Gardeners.
Obviously, you still have to pay any movement
costs. The usual rules apply.
You can also split the Watering and Planting
actions. In other words, more Flower beds will
be within range for those actions.
2 Gardeners cannot occupy the same space.
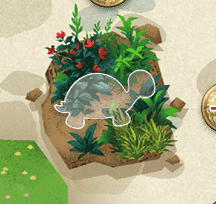
As you can see, your Animals are now spread throughout the Flower beds in your Garden.
By taking care of those Animals, you can unlock additional Flower beds and significant bonuses for the rest of the game.
-
When you choose the Animal action,
take 1 Animal of your choice
from your Garden and place it on its respective space.
-
Important: The Flower bed with the Animal on it does not have to
be within range of your Gardener.
-
The tortoise’s space is on your Garden tableau; the spaces for all
other Animals are on the game board.
-
Flower beds with Animals are not available for Planting until you
have removed the Animal.
-
All Animal bonuses only count from the moment you unlock them.
Not retroactively!
|
You use the Animal action to
remove the Butterfly from its Flower
bed and place it in its space on the
game board.
Now you can plant in that Flower bed,
and get all the bonuses for the Butterfly
space.
|
Depending on which Animal you chose, you receive the following bonuses:
Bird

|
You immediately score 4 Victory Points. From now on, you score 4 Victory Points whenever
you unlock another Animal, and an extra 4 Victory Points whenever you score a Prize token.
|
|
Squirrel

|
From now on, whenever one of your columns is completely filled with Plants,
you
immediately gain 6 Coins.
Reminder: Since you can never remove Plants, only replace them, you can only fill each column once.
|
|
Butterfly

|
From now on, you score extra Victory Points for each task you complete.
You score 2 extra Points for Basic tasks and 6 extra Points for Special tasks.
|

|
Frog
Tortoise
For the botanically minded and curious players, here are some facts about the level IV Plants in the game.
These are not part of the rules or otherwise relevant for gameplay.
|
Pavonia Multiflora
Family: Malvaceae. Its order,
Malvales, consists of nine
families, containing about 243
genera and between 4,225 and
4,300 species. The best known
examples cultivated by humans
are okra, cotton, and the cacao
tree.
|
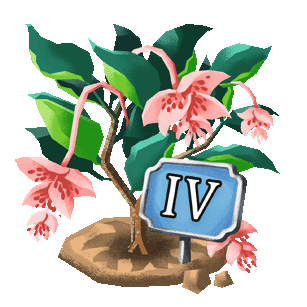
Madinilla Magnifica
Family: Melastomataceae.
This is one of the few species of
Medinilla to grow magnificent
hanging clusters of flowers
(inflorescence), with sometimes
over 100 individual pink or
reddish petals.
|
|
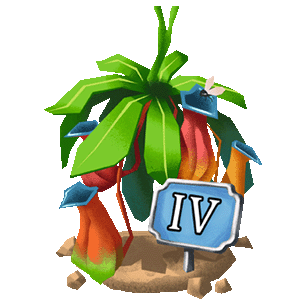
Nepenthes Alata
Family: Nepenthaceae
(pitcher plants).
This is a carnivorous plant
native to the Philippines. Its
pitchers have two tooth-like
ridges.
|

Guzmania
Family: Bromeliaceae.
This plant’s petals always grow
in groups of three and form a
funnel for catching water. Its
seeds have a “parachute” like
the seeds of a dandelion.
|
|

Anthurium
Family: Araceae. With
somewhere between 600 and
1,000 species, this is the most
diverse genus of the Araceae
family. It primarily grows in
Central and South America
and the Caribbean.
|
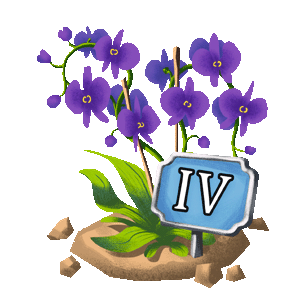
Orchid
Family: Orchidaceae.
The characteristic shape of its
root tubers gave this family
its name (from the Greek
‘órcheis’, meaning ‘testicles’).
It is the second largest family of
flowering plants.
|
|
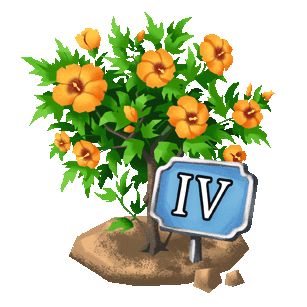
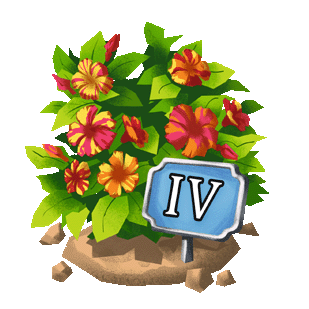
Hibiscus
Hibiscus is a genus of the
Malvoideae subfamily within
the Malvaceae family. It
is a common decorative
houseplant. Its fruit is a dry fivelobed
capsule which dehisces
(splits open) at maturity.
|

Strelitzia Reginae
Also called crane flower or bird of
paradise. Family: Strelitziaceae.
This is a low-maintenance,
evergreen plant that grows
between 80 and 200 cm tall. Its
large, strong leaves are similar
to banana leaves and grow up
to 100 cm long.
|
|
Mammillaria Elongata
Also called ladyfinger cactus.
Family: Cactaceae.
This cactus forms dense groups
of elongated cylindrical stems
that are 1-3 cm in diameter. Its
tubercles are slim and conical
with woolly areoles, while its
axillae are (almost) bald.
|
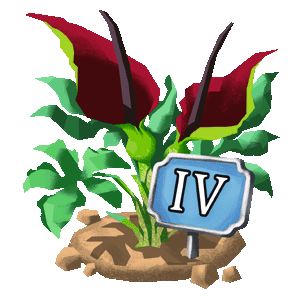
Dracunculus Vulgaris
Also called dragon lily.
Another member of the Araceae
family. The family resemblance
is obvious. It emits a strong and
unpleasant scent, similar to that
of rotting meat, to attract flies
that then pollinate the plant.
|
|
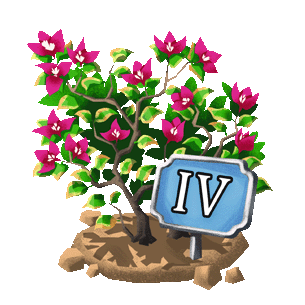
Bougainvillea Glabra
Family: Nyctaginaceae.
This is an evergreen, climbing
shrub with thick, thorny stems
and drooping branches. It
can grow up to 10 meters tall
and its tiny white flowers are
surrounded by colorful papery
bracts.
|
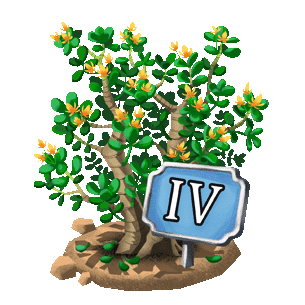
Crassula ovata
Also called money tree.
Family: Crassulaceae.
It flourishes in the company of
aloe, euphorbia, portulacaria
afra, and other succulent
plants, reaching heights of
up to 2.5 meters.
|
|

Brugmansia
Also called angel’s trumpet.
Family: Solanaceae. The genus
is divided into two sections
(warm-growing and cold group)
and is part of the nightshade
family. Caution: Due to the
high concentration of alkaloid
compounds, all parts of the
plant are highly toxic.
|
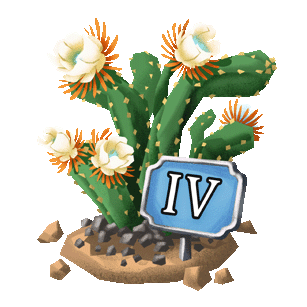
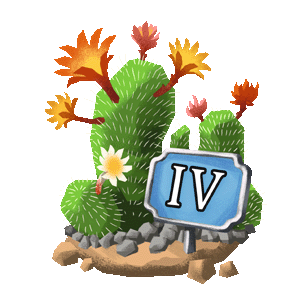
Selenicereus Grandiflorus
Family: Cactaceae.
It should come as no surprise
that this cactus is part of the
Cactaceae family.
It earned its nickname, “Queen
of the Night”, because its flowers
only bloom only once a year, for
a single night.
|
|

Monstera Deliciosa
Variegata
Family: Araceae.
Its fruit resembles a green
ear of maize covered with
hexagonal scales. As the fruit
ripens, these scales fall off. The
fruit is edible and its taste is
similar to that of pineapple and
banana. It should only be eaten
if fully ripened, however, since
unripe fruit contains crystals
of calcium oxalate that irritate
your mouth.
|
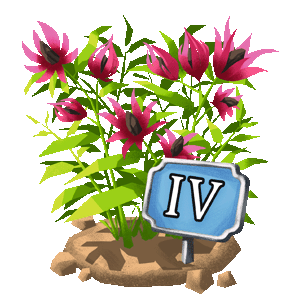
Mirabilis Jalapa
Family: Nyctaginaceae.
The Aztecs cultivated it for
ornamental and medicinal
purposes, and explorers first
brought it to Europe in 1525.
It was commonly used as
an example in the study of
Mendelian genetics.
|
|
Canna Indica
Family: Cannaceae.
The family consists of only a
single genus of 10 species. This
plant has been cultivated by
humans for millennia. Despite
its name, it has no relation to
India—a European explorer got
it wrong…
|
Lilium
Family: Liliaceae
The 16 genera and
approximately 630 species
of Liliaceae are native to the
temperate zones of the Northern
Hemisphere. Historically, up
to 3,500 plant species were
considered lilies; many of them
are now considered part of the
Agavaceae family.
|
|

Victoria Amazonica
Family: Nymphaeaceae
(water lilies).
Its flowers are up to 40 cm wide
and bloom for two days. The
initially white flowers open in
the early evening and spread
a scent resembling carrion
to attract insects. During
the day, the flower heats up
considerably, so at night, it is
still several degrees warmer
than the surrounding air.
|

Spathiphyllum
Family: Araceae.
This plant has no sap. Its
creeping rootstalks with short
internodes are partially visible
above the ground. The genus
consists of about 50 species,
most of which are native to
Central and South America.
|
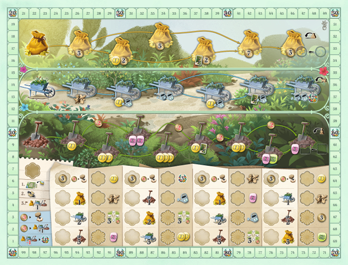
In the first round, the flower tiles on the main board are laying on their light side. Before starting round 2,
these are flipped to their dark side.
After round 2, there's a final turn in which all players' flower meeples are back on the start space.
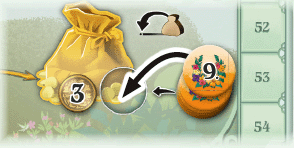
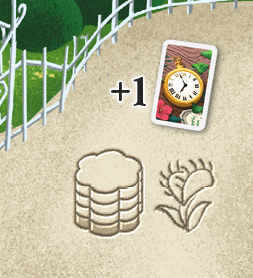
In the Expert variant; the money track has two different locations for bonus tokes.
You can only claim the bonus if there is a token left.
The pre-printed image is a placeholder and does not represent such token.